If you’ve been following the latest shifts in Valorant’s meta, you know how pivotal mastering the Operator can be to turning the tide of any match. With recent updates tweaking agent abilities and map dynamics, understanding how to wield this sniper rifle effectively is more crucial than ever.
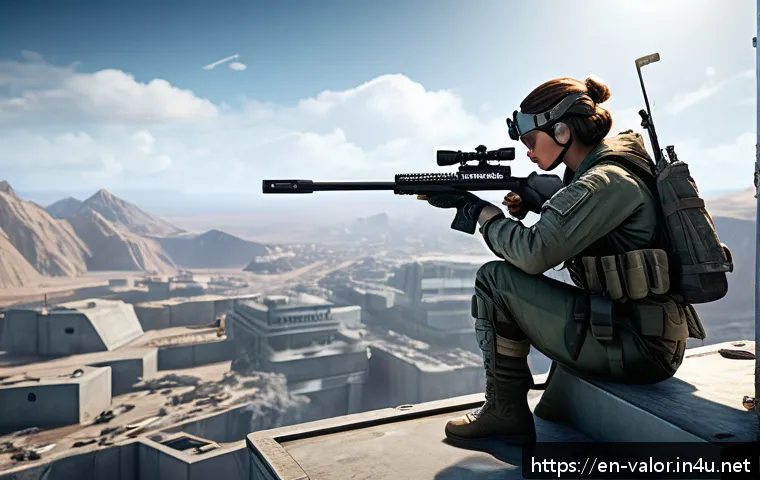
Whether you’re climbing the ranks or just aiming to sharpen your skills, nailing the Operator’s mechanics and positioning can make all the difference.
In this guide, I’ll share practical tips and strategies I’ve tested firsthand to help you dominate every round with confidence. Let’s dive into the world of precise shots and smart plays that elevate your game to the next level.
Refining Your Aim and Trigger Discipline
Understanding the Operator’s Mechanics
Mastering the Operator starts with grasping its unique firing mechanics. Unlike most weapons in Valorant, the Operator delivers a one-shot kill to the body and head, which means precision is non-negotiable.
However, the rifle’s slow firing rate and hefty zoom can throw off new users. When I first picked it up, I found that taking my time to line up shots rather than rushing was a game-changer.
Position your crosshair at common angles and wait patiently for enemies to peek instead of spraying randomly. This deliberate approach makes every shot count and keeps your economy stable since you won’t be wasting bullets.
Trigger Discipline: When to Shoot and When to Hold
Trigger discipline is crucial with the Operator because missing a shot leaves you vulnerable during the long reload animation and scoped-in delay. From my experience, holding your shot until you’re absolutely sure of your target’s position reduces unnecessary risk.
For example, if you hear footsteps or spot movement, don’t immediately scope in and fire. Instead, prepare your aim just before the enemy appears. This timing ensures that you land the kill before they can react.
Also, learn to disengage quickly after firing to reposition or reload safely—staying scoped in too long can make you an easy target for flanking.
Practice Drills to Improve Consistency
Improving aim with the Operator isn’t just about raw talent—it’s about consistent practice. I recommend spending time in Valorant’s practice range focusing on flick shots and quick-scoping drills.
Try setting up scenarios where you snap from one angle to another rapidly, simulating real match conditions. You can also use deathmatch modes to practice quick peeks and instant shots under pressure.
The key is to develop muscle memory for the rifle’s scope sensitivity and bullet travel time, so it feels natural during actual games.
Mastering Positioning for Maximum Impact
Choosing the Right Angles to Hold
Positioning with the Operator can make or break your rounds. Since the rifle excels at long-range engagements, you want to select spots that maximize your line of sight while minimizing exposure.
I’ve found that holding tight angles near site entrances or long corridors often yields the best results. These positions allow you to pick off opponents before they can close the distance.
Additionally, use map knowledge to anticipate enemy rotations and position yourself accordingly. For instance, on maps like Bind or Icebox, controlling mid or long sightlines with the Operator can dictate the flow of the round.
Utilizing Elevation and Cover Effectively
Elevated positions give you a significant advantage when wielding the Operator. From a higher vantage point, you can see over common cover spots and control choke points more easily.
I always try to find a spot where I can peek safely behind cover after taking a shot. This hit-and-run playstyle keeps enemies guessing and reduces the chance of being traded.
Don’t underestimate the power of unexpected angles either—sometimes holding unconventional spots can catch opponents off guard and secure easy kills.
Rotations and Map Awareness
Being aware of when to rotate or reposition is vital for any Operator user. Since your weapon is less effective in close quarters, moving to a new angle after getting a pick helps maintain pressure on the enemy team.
I usually listen for team calls and sound cues to decide if it’s time to switch positions. For example, if teammates lose control of a site or you hear multiple enemies pushing a different area, it’s smart to fall back and hold a safer line of sight.
This flexibility keeps your presence felt throughout the map and prevents you from becoming predictable.
Optimizing Utility to Support Your Sniping
Using Smokes and Recon for Safer Picks
While the Operator itself is powerful, pairing it with utility from your agent or teammates amplifies its effectiveness. I’ve noticed that deploying smokes or recon abilities to block enemy vision or gather intel before peeking can drastically improve your success rate.
For example, using Sova’s Recon Bolt or Cypher’s Spycam to reveal enemy positions lets you pre-aim and secure picks without exposing yourself unnecessarily.
Coordinating with teammates to time these utilities before your shots makes you far more deadly.
Combining Utility with Positioning
Integrating utility usage with your positioning creates a layered defense that’s tough to break. For instance, if you hold a long angle, having a teammate throw a smoke to block off common flanking routes allows you to focus solely on your crosshair.
When I’ve done this, it feels like I’m playing with an extra pair of eyes and shields, which boosts confidence and accuracy. Remember, good communication here is key—let your team know when you’re ready to engage so they can support your angles effectively.
Using Utility to Disrupt Enemy Strategies
Beyond defense, utility can be a great tool to disrupt enemy plans and force mistakes. Throwing a well-timed flash or molly before peeking can make enemies hesitate or reposition awkwardly, giving you the perfect moment to capitalize with your shot.
I recall a match where a teammate’s flash allowed me to secure multiple kills on a retake because enemies were blinded and disoriented. Even if you don’t have utility yourself, encouraging teammates to use theirs in sync with your Operator playstyle can turn the tide of rounds.
Economic Management and Weapon Buying Strategies
When to Prioritize the Operator Purchase
The Operator’s high cost demands careful economic planning. I’ve learned that buying it too early in a losing streak or without sufficient team support often backfires.
Instead, consider the game state and your team’s economy before splurging. If you’re confident in your ability to carry rounds and your teammates can cover you, it’s worth investing.
Otherwise, sometimes saving for utility or other weapons can yield better overall results. Timing your buys to maximize round impact is a subtle but crucial skill.
Balancing Ammo and Economy
Ammo management is often overlooked but vital when using the Operator. Missing shots can quickly drain your limited bullets and force awkward reloads mid-fight.
From my matches, I noticed that pacing your shots and only firing when you’re sure helps conserve ammo and keeps you ready for extended engagements. Additionally, keep an eye on your team’s economy to avoid forcing them into weak buys.
Coordinating purchases so your team can afford complementary weapons and utility creates a more balanced and powerful lineup.
Fallback Options When the Operator Isn’t Viable
Sometimes the Operator isn’t the best choice, especially in close-quarters maps or when your economy can’t support it. In those cases, switching to a more versatile rifle like the Guardian or Phantom can keep you effective without breaking the bank.
I personally switch up my loadout depending on map layout and enemy playstyle. Having a plan B makes you a more adaptable player and prevents the frustration of struggling with an ill-suited weapon.
Adapting to Meta Changes and Agent Synergies
Staying Updated with Patch Changes
Valorant’s meta is constantly evolving, and staying ahead means adapting your Operator playstyle accordingly. Recent updates might tweak agent abilities or map features that influence how you position or engage.
I make it a habit to read patch notes and watch pro matches to see how top players handle these changes. For example, if a map gains new cover or an agent’s utility becomes more popular, adjusting your angles and timing can keep you relevant.
Flexibility and willingness to learn are key here.
Leveraging Agent Abilities to Enhance Operator Play
Certain agents naturally complement the Operator’s strengths. Agents like Sage or Killjoy who can lock down areas with slows or traps allow you to hold angles with more confidence.
I’ve found that pairing with these agents not only enhances my survivability but also increases kill opportunities by funneling enemies into predictable paths.
Coordinating your Operator play with your team’s utility usage can create devastating setups that opponents struggle to counter.
Countering Popular Meta Agents
Knowing how to counter meta agents who threaten your Operator position is essential. For example, agents like Reyna or Raze with aggressive mobility can flush you out quickly if you’re careless.
I’ve learned to anticipate these threats by repositioning often and using utility to deny their advances. Recognizing enemy tendencies and adapting your playstyle to minimize their impact keeps you in control.
It’s about outsmarting, not just outshooting, your opponents.
Analyzing High-Level Gameplay for Insights
Studying Pro Player Operator Techniques
Watching professional Valorant matches has been an eye-opener for me. The way top players combine positioning, utility, and timing with the Operator is incredibly precise.
They rarely take unnecessary risks, and their crosshair placement is near flawless. I try to emulate their patience and decision-making in my own games.
For example, the way they use subtle movements to bait opponents or how they rotate seamlessly after a kill shows a level of game sense that’s worth learning from.
Breaking Down Common Mistakes and How to Avoid Them
One recurring mistake I noticed in less experienced players is over-scoping and tunnel visioning. This often leads to getting flanked or missing critical sound cues.
Learning to scope in and out quickly, while maintaining awareness of your surroundings, is something I had to consciously practice. Another common error is poor communication—failing to inform teammates about your position or enemy locations limits your team’s potential.
Always keep your team in the loop for coordinated plays.
Incorporating Replay Reviews into Your Improvement Routine
Reviewing your own gameplay through replays is a powerful tool I highly recommend. It lets you spot habits you might not notice mid-match, like bad positioning or missed callouts.
When I started recording and analyzing my Operator rounds, I saw clear patterns of mistakes and strengths, which helped me focus my practice. Taking notes on what worked and what didn’t turns every session into a learning opportunity and accelerates your climb up the ranks.
| Aspect | Key Tips | Common Pitfalls | Recommended Practice |
|---|---|---|---|
| Aim & Trigger Discipline | Patience before shooting, practice flicks, muscle memory | Rushing shots, missing due to haste | Practice range flick shots, deathmatch scenarios |
| Positioning | Hold long sightlines, use elevation, reposition after kills | Staying static, poor cover usage | Map study, dynamic positioning drills |
| Utility Use | Coordinate smokes/recon, disrupt enemy setups | Ignoring team utility, exposing yourself | Team communication, timed utility usage |
| Economy | Smart buys, ammo conservation, fallback weapons | Overspending, wasting ammo | Economy tracking, adaptive buying |
| Meta Adaptation | Stay updated on patches, counter meta agents | Rigid playstyle, ignoring new strategies | Watch pro matches, patch note review |
| Game Analysis | Review replays, learn from pros, communicate | Ignoring mistakes, poor teamwork | Replay reviews, team discussions |
In Conclusion
Mastering the Operator requires patience, precision, and strategic thinking. By refining your aim, positioning smartly, and using utility effectively, you can dominate rounds and influence the flow of the game. Remember, adaptability and continuous practice are key to staying ahead in Valorant’s evolving meta. Keep learning from both your successes and mistakes to elevate your gameplay consistently.
Helpful Tips to Remember
1. Always take your time lining up shots to maximize the Operator’s one-shot potential. Rushing leads to missed opportunities and wasted ammo.
2. Use elevated positions and tight angles to control sightlines while minimizing your exposure to enemy fire.
3. Coordinate utility with your team to block vision, gather intel, and create openings for safer picks.
4. Manage your economy wisely by timing your Operator purchases and conserving ammo during engagements.
5. Stay updated on meta shifts and learn from pro players to adapt your strategies and counter enemy tactics effectively.
Key Takeaways
Consistent aim and trigger discipline are fundamental to Operator success—patience beats haste every time. Positioning should prioritize long sightlines and cover, complemented by smart rotations. Utility is not just supportive but essential for setting up kills and disrupting opponents. Economic awareness ensures you don’t overextend financially, maintaining team balance. Finally, staying flexible and informed about meta changes will keep your Operator play relevant and impactful throughout the competitive landscape.
Frequently Asked Questions (FAQ) 📖
Q: uestions about Mastering the Operator in ValorantQ1: What are the best map positions to hold when using the Operator?
A: Choosing the right position is key to maximizing the Operator’s impact. Generally, long sightlines and narrow choke points give you the best chance to land one-shot kills.
For example, on maps like Bind, holding Hookah or A Long allows you to control enemy rotations effectively. On Split, spots like B Heaven or Mid Vent are ideal for picking off opponents crossing critical areas.
Always consider your team’s setup and rotate if your angle becomes predictable. I’ve found that constantly changing your position after each kill keeps enemies guessing and helps maintain your advantage.
Q: How do I improve my reaction time and accuracy with the Operator?
A: Improving reaction time with the Operator involves a mix of practice and game sense. Warm up with aim trainers or custom games focusing on flick shots to build muscle memory.
In actual matches, try to anticipate enemy movements rather than just reacting—predict where opponents will appear and pre-aim those spots. I personally practice slow and steady crosshair placement instead of rushing my shots; this helps reduce misses.
Also, don’t forget to use the Operator’s zoom wisely—scoping in too early can slow your reaction, but timing it right ensures precision.
Q: Should I always buy the Operator, or are there situations where it’s better to save?
A: While the Operator is a powerful weapon, it’s not always the best choice every round. If your team is low on economy or the enemy is running fast-paced agents that close distances quickly, investing in the Operator might not pay off.
I usually opt for it on eco or full-buy rounds where my team can support me with utility to hold angles safely. Sometimes, saving or going for a versatile rifle like the Vandal or Phantom allows for more aggressive plays and better team synergy.
Balancing your buys based on the match flow and your team’s strategy is crucial for consistent success.