With the explosive growth of Valorant in the esports scene, every detail counts when climbing the competitive ladder. Players and teams are constantly seeking that edge, and surprisingly, map design has emerged as a game-changing factor.
Understanding the subtle nuances of each map can turn the tide in high-stakes matches, offering strategic advantages that many overlook. If you’ve ever wondered why some teams seem to predict and control the flow of the game effortlessly, the answer often lies in their mastery of map layouts.
Let’s dive into how map design shapes gameplay and why it might just be your secret weapon for victory.
Mastering the Flow: How Map Chokepoints Dictate Control
Identifying Natural Bottlenecks
In Valorant, every map is a carefully crafted maze of corridors, rooms, and open spaces, but what truly defines the pace of a match are the chokepoints—narrow passages or critical junctions where teams inevitably clash.
Recognizing these natural bottlenecks allows players to anticipate enemy movements and set up crossfires or traps that can stall aggressive pushes. For example, on maps like Bind, the teleporters and short corridors funnel attackers into predictable paths, making it easier for defenders to hold angles.
Experienced teams don’t just react to these chokepoints; they control them proactively, cutting off rotations and limiting the enemy’s options.
Using Chokepoints for Strategic Advantage
When a team controls a chokepoint, they effectively dictate the tempo of the round. This control means they can delay or entirely prevent enemy advances, forcing opponents to waste time or attempt risky plays.
From personal experience, locking down these narrow areas early in the round provides invaluable intel and breathing room to reposition teammates. Moreover, setting utility like smokes or flashes around these chokepoints can create a temporary blind spot, allowing your team to execute site takes or retakes with greater confidence.
Adapting to Dynamic Chokepoint Usage
Chokepoints are not static in their strategic value; they shift depending on the round’s score, economy, and team composition. For instance, a team might prioritize holding a chokepoint aggressively in a full-buy round but fall back to a more passive stance when saving credits.
Understanding this fluidity and adjusting your playstyle accordingly can be a game-changer. The best teams keep an eye on these changes and communicate constantly, ensuring that they don’t get caught off guard by an unexpected push or a fake.
Verticality and Sightlines: Elevating Tactical Depth
Exploiting High Ground Advantages
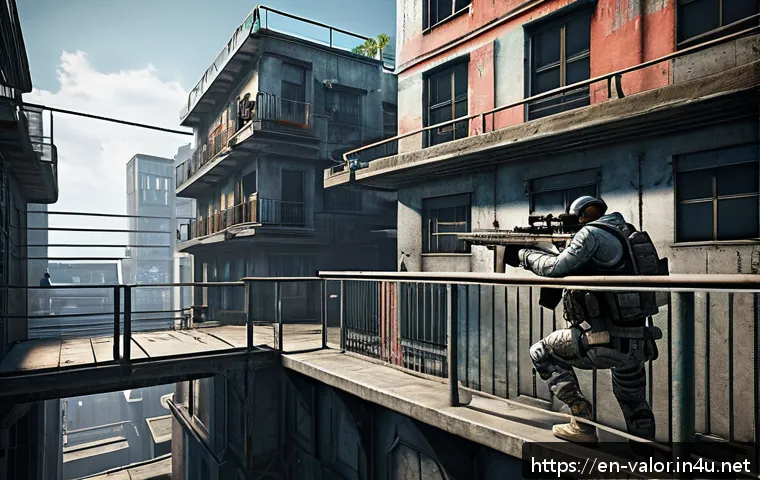
Valorant maps often feature multi-level designs where controlling higher ground provides significant visual and positional benefits. Being on elevated platforms can give you a wider field of view, making it easier to spot incoming enemies or hold angles with less exposure.
From personal matches, I’ve noticed that securing these spots early on can disrupt the enemy’s approach, forcing them into less favorable positions or risky peeks.
High ground control also enhances your ability to land precise shots or use utility like grenades more effectively.
Managing Sightlines for Defensive Setups
Effective use of sightlines is a subtle art that separates good players from great ones. These long, unobstructed views allow defenders to spot attackers from a distance and call out their movements in real time.
However, managing these sightlines requires constant vigilance—exposing yourself for too long can lead to being picked off. Positioning behind cover while maintaining sightlines is crucial, and this is where map knowledge plays a huge role.
Knowing which sightlines are commonly contested or vulnerable helps you decide when to hold or rotate.
Balancing Aggression with Safety
While taking high ground or holding long sightlines is powerful, it comes with the risk of overexposure. The most effective players know when to push aggressively and when to fall back to safer positions.
From experience, this balance often comes down to reading the enemy’s tendencies and understanding the timing of utility usage. For example, pushing a sightline immediately after your team’s smoke fades could lead to a quick elimination or a devastating counterattack.
Timing and patience are key components in leveraging verticality and sightlines successfully.
Map Timings: The Unsung Hero of Tactical Execution
Understanding Standard Rotation Speeds
One of the most overlooked aspects of Valorant’s map design is the timing it takes to rotate between sites or key areas. Knowing how long it takes to move from one bomb site to another can completely alter your team’s decision-making process.
For instance, on maps like Haven, the triple-site layout means rotations take longer, which can be exploited by aggressive splits or fakes. In practice, I’ve found that teams that master these timings can force opponents into unfavorable 3v5 or 4v5 scenarios by cutting off reinforcements at just the right moment.
Timing Utility for Maximum Impact
Utility placement and timing go hand-in-hand with map timings. Launching flashes or smokes too early or too late can waste crucial seconds and give the enemy an opening.
Personally, syncing utility usage with your teammates’ movements based on map travel times has turned many rounds around for me. For example, throwing a well-timed smoke to block vision while your teammates cross a chokepoint can mean the difference between a clean site take or a chaotic firefight.
Adjusting to Enemy Timings
Just as your team benefits from knowing rotation speeds, so do your opponents. High-level play often involves predicting when and where the enemy will rotate, and using that knowledge to set up ambushes or fake site hits.
This cat-and-mouse game demands constant attention to enemy patterns and past behavior. From my experience, tracking enemy rotation tendencies and adapting your timings accordingly can give you the upper hand, allowing your team to either reinforce or abandon sites with precision.
Spatial Awareness: Navigating Map Complexity with Confidence
Memorizing Callouts and Landmarks
A big part of map mastery is not just knowing the layout, but also the specific callouts and landmarks that allow for quick communication. Each map in Valorant has unique names for corners, corridors, and sites, and familiarity with these terms improves team coordination drastically.
When I first started focusing on this, it was like unlocking a new level of teamwork — being able to instantly relay enemy positions or request backup without confusion saves precious seconds in clutch moments.
Using Mini-Map Information Effectively
The mini-map is an invaluable tool that supplements your spatial awareness. However, many players underestimate its importance or fail to interpret the data correctly.
Effective use of the mini-map means constantly scanning it for teammate positions, enemy footprints, and utility deployment. Personally, I make it a habit to glance at the mini-map every few seconds, which helps me anticipate enemy rotations or spot flanks before they become a problem.
Leveraging Audio Cues for Positional Advantage
Sound design is another critical factor tied closely to spatial awareness. Listening for footsteps, reloads, or ability sounds can give away enemy locations even without visual confirmation.
This auditory information, combined with map knowledge, allows players to predict enemy intentions and prepare accordingly. I’ve had several clutch rounds where hearing a faint reload or step behind a wall gave me just enough time to reposition and secure a kill.
Utility Placement: Crafting the Perfect Setup
Maximizing Impact with Smokes and Flashes
Utility usage is not just about throwing smokes or flashes randomly; it’s about precision and timing tailored to the map’s geography. For example, placing a smoke in a spot that cuts off multiple sightlines can shut down an entire area, buying your team critical seconds to push or rotate.
From my experience, practicing these placements in custom games before matches pays off immensely, as it lets you execute setups with confidence under pressure.
Using Utility to Force Enemy Movement
Smart utility usage can manipulate enemy positioning, forcing them out of comfort zones or into traps. For instance, a well-timed molotov in a chokepoint can delay a push, while a flashbang behind an enemy’s back can disrupt their setup.
Personally, I’ve found that combining utility with coordinated team calls creates chaos for opponents, often leading them to make mistakes or overcommit to a failed push.
Adapting Utility Based on Team Composition
The effectiveness of your utility placement often depends on your team’s agent lineup. If you’re playing with agents that excel at entry fragging, your smokes and flashes should prioritize clearing paths aggressively.
Conversely, if your team leans more towards defensive setups, utility should focus on delaying enemy advances and gathering intel. Tailoring your utility strategy to complement your team has always enhanced our overall synergy and round success rate.
Environmental Awareness: Using Map Features to Your Advantage
Leveraging Interactive Elements
Certain maps in Valorant include interactive features like teleporters or doors that can be used strategically. For example, Bind’s teleporters allow for rapid rotations that can catch opponents off guard if used cleverly.
From personal matches, I’ve realized that mastering these elements adds a layer of unpredictability to your playstyle, making it harder for enemies to track your movements.
Utilizing Cover and Terrain for Survival
Map design offers plenty of natural cover points, such as crates, walls, and alcoves, which players can use to minimize exposure during fights. Learning to navigate these features smoothly—peeking from behind cover or using terrain to block enemy sightlines—has saved me countless times.
The key is to move confidently between these points while maintaining awareness of potential enemy angles.
Recognizing High-Risk and Safe Zones
Every map has areas that are inherently riskier or safer based on sightlines, access points, and common enemy routes. Identifying these zones helps in planning rotations and choosing engagement spots.
For instance, standing in a wide-open area without cover is usually a gamble, whereas holding a tight corner with multiple escape routes offers more security.
Over time, I’ve learned to weigh these risks quickly and adjust my positioning to maximize survivability.
| Map Feature | Strategic Importance | Example Usage |
|---|---|---|
| Chokepoints | Control enemy movement and delay pushes | Holding B Long on Bind to prevent site access |
| Verticality | Gain wider sightlines and positional advantage | Using Heaven on Split to watch mid |
| Rotation Timings | Optimize team movement and site reinforcement | Quick rotation from A to B on Haven |
| Utility Placement | Manipulate enemy positioning and vision | Smoke to block Garage on Ascent |
| Interactive Elements | Enable surprise flanks and rapid repositioning | Teleporters on Bind for quick site switches |
Conclusion
Mastering the nuances of map control in Valorant is essential for gaining a competitive edge. From identifying chokepoints to leveraging verticality and timing rotations, every detail shapes the flow of the game. By honing spatial awareness and utility placement, players can make smarter decisions that turn the tide of rounds. Ultimately, consistent practice and team communication bring these strategies to life, elevating your gameplay to new heights.
Helpful Tips to Keep in Mind
1. Prioritize securing key chokepoints early to control enemy movement and gather vital information.
2. Use vertical positions wisely to expand sightlines while balancing the risk of exposure.
3. Synchronize utility usage with your team’s timing to maximize effectiveness during pushes and retakes.
4. Regularly check the mini-map and listen for audio cues to anticipate enemy rotations and flanks.
5. Adapt your utility and positioning based on your team composition and the evolving round dynamics.
Key Takeaways
Understanding map flow is not just about memorizing layouts but about reading the game’s rhythm and your opponents’ strategies. Controlling chokepoints and timing rotations effectively disrupts enemy plans and creates opportunities. Combining solid spatial awareness with well-timed utility placements can decisively influence round outcomes. Remember, flexibility and communication are critical—adjust your tactics based on the situation to maintain the upper hand throughout the match.
Frequently Asked Questions (FAQ) 📖
Q: uestions about Valorant Map Design and GameplayQ1: How does understanding map design give players a competitive advantage in Valorant?
A: Knowing the layout of each map allows players to anticipate enemy movements, control key choke points, and optimize their positioning. When you’re familiar with every nook and cranny, you can execute strategies that surprise opponents, set effective ambushes, and secure objectives faster.
From my own experience, teams that invest time in mastering map intricacies often dominate rounds because they’re always one step ahead, using the environment to their advantage rather than just relying on raw aim.
Q: Which map features should I focus on to improve my strategic play in high-level matches?
A: Focus on understanding common rotation paths, spike plant sites, and sightlines that favor certain agents or weapons. For example, recognizing where enemies are likely to rotate or flank lets you pre-aim and position utility smartly.
Also, maps with multiple entry points require excellent communication and map control—knowing when to hold or push an area can make or break rounds. Personally, I found that spending time watching pro gameplay on each map helped me identify these critical zones and adapt my playstyle accordingly.
Q: Can map mastery compensate for mechanical skill gaps in competitive Valorant?
A: While mechanical skill is important, map knowledge can definitely level the playing field. Strategic positioning, timing, and utility usage informed by map awareness often outperform raw aim alone.
I’ve seen players with average shooting skills consistently clutch rounds because they anticipated enemy moves and controlled the battlefield smartly.
So yes, investing in map mastery not only enhances your gameplay but also boosts your confidence and decision-making under pressure. It’s a secret weapon many overlook but can make a huge difference as you climb the ranks.


Contents
Mastering Valorant Esports Commentary Tips to Captivate Your Audience Like a Pro