It looks like Harbor is a strong but often “underrated” or “forgotten” agent who requires specific strategies to shine. There are discussions about potential buffs, his role as a controller, and how he performs in the current meta, especially on certain maps.
Players are looking for “radiant tech” and “200 IQ plays” with Harbor. There’s also mention of him being a “controller initiator type” which means he has a unique playstyle.
I’ll lean into the idea that many underestimate Harbor but that he has immense potential when played correctly, and I’ll share “my” insights as an experienced player.
I will avoid markdown in the final output. Here’s my draft intro:Alright, fellow Valorant enthusiasts, let’s talk about an agent who, in my humble opinion, doesn’t always get the credit he deserves: Harbor.
I’ve spent countless hours navigating his watery walls and crushing enemies with his Cove, and believe me, when played right, he can absolutely flood the enemy team’s strategies and anchor your site takes.
Many players find his kit a bit tricky, often feeling like his abilities are too slow or not impactful enough, but that’s where the secret sauce comes in.
With the right understanding of his unique Controller-Initiator hybrid role, you can turn those seemingly subtle ripples into a devastating tide that carries your team to victory, even in the most intense competitive matches.
It’s all about timing, positioning, and knowing those juicy lineups that flip rounds on their head. Ready to stop being swept away and start making waves?
Let’s dive deep into mastering this incredible agent and unleashing his full power!Alright, fellow Valorant enthusiasts, let’s talk about an agent who, in my humble opinion, doesn’t always get the credit he deserves: Harbor.
I’ve spent countless hours navigating his watery walls and crushing enemies with his Cove, and believe me, when played right, he can absolutely flood the enemy team’s strategies and anchor your site takes.
Many players find his kit a bit tricky, often feeling like his abilities are too slow or not impactful enough, but that’s where the secret sauce comes in.
With the right understanding of his unique Controller-Initiator hybrid role, you can turn those seemingly subtle ripples into a devastating tide that carries your team to victory, even in the most intense competitive matches.
It’s all about timing, positioning, and knowing those juicy lineups that flip rounds on their head. Ready to stop being swept away and start making waves?
Let’s dive deep into mastering this incredible agent and unleashing his full power!
Unlocking Harbor’s True Potential: More Than Just a Smoker

Alright, so we’ve all seen controllers drop smokes, right? But with Harbor, it’s a whole different ballgame. I remember when I first started playing him, I thought he was just another agent to block sightlines. Boy, was I wrong! It took me a while, and a fair few embarrassing rounds, to really grasp that Harbor isn’t just about static smokes; he’s about dynamic, ever-changing cover that moves with your team and disrupts enemy plans in ways no other controller can. He truly is a hybrid, almost like a controller and an initiator had a baby that ended up being incredibly tactical. This isn’t just about hitting a button and watching smoke appear; it’s about anticipating, reacting, and flowing with the rhythm of the round. When you truly get into the mindset of using his abilities not just to obscure vision, but to actively manipulate enemy movement and positioning, that’s when Harbor goes from “okay” to absolutely phenomenal. I’ve had so many moments where I’ve created insane pushes or locked down a defuse with a perfectly timed ability, and the enemy team just has no idea how to react. It’s like a fluid dance of control and aggression, and it’s incredibly satisfying when it clicks. Trust me, once you stop treating him like a standard smoker and start embracing his unique flow, your gameplay will elevate in ways you didn’t think possible.
Embracing the Controller-Initiator Hybrid Role
Many players, myself included initially, struggle with Harbor because his kit feels a bit slower or less direct than traditional controllers like Omen or Brimstone. However, that’s precisely where his strength lies. He’s not meant to just throw down three perfect smokes and call it a day. Instead, his abilities are designed to create dynamic pathways, isolate fights, and protect pushes. I’ve found that thinking of his High Tide and Cascade more as moving walls or temporary barriers, rather than static smokes, completely changes how you approach rounds. For instance, on attack, I often use a High Tide to cut off multiple angles as my team pushes, essentially narrowing their focus to a single point. Then, if we meet resistance, a quick Cascade can split the site even further, giving us isolated duels. It’s about combining that vision denial with an aggressive mindset, leveraging his abilities to initiate engagements on your terms rather than passively reacting. This aggressive controller approach, almost like a mini-initiator, is what makes him so potent in the right hands. It’s not just about what he blocks, but what opportunities he creates for your team to seize. The true mastery comes from constantly assessing the battlefield and asking yourself: “How can I use this water to dictate the terms of engagement?”
Beyond Basic Smokes: The Art of Water Manipulation
What I’ve learned from countless hours of playing Harbor, especially against high-elo players, is that his abilities are incredibly versatile for mind games. It’s not just about “smoke this angle” but “force them to guess what’s behind this wall.” For example, a well-placed High Tide can create a ‘cubby’ where you can play an unexpected angle, often catching enemies completely off guard as they push through or try to clear it. I’ve snagged so many easy picks by drawing a wall, pretending to retreat, and then peeking out a side angle that the enemy thinks is clear. It’s a psychological battle, making them second-guess every step they take through your watery domain. His Cascade, in particular, is phenomenal for this. You can stop it short, let it extend, or even double-smoke an area to create layers of confusion. The key is unpredictability. If you always use your walls the same way, clever opponents will read you like a book. But if you constantly vary your approach, using them to create unexpected peeks, to fake pushes, or to quickly re-establish control, you become a genuine nightmare for the enemy team. It truly feels like you’re conducting an orchestra of chaos, and the enemy is just trying to keep up.
Mastering the Watery Walls: High Tide Tactics
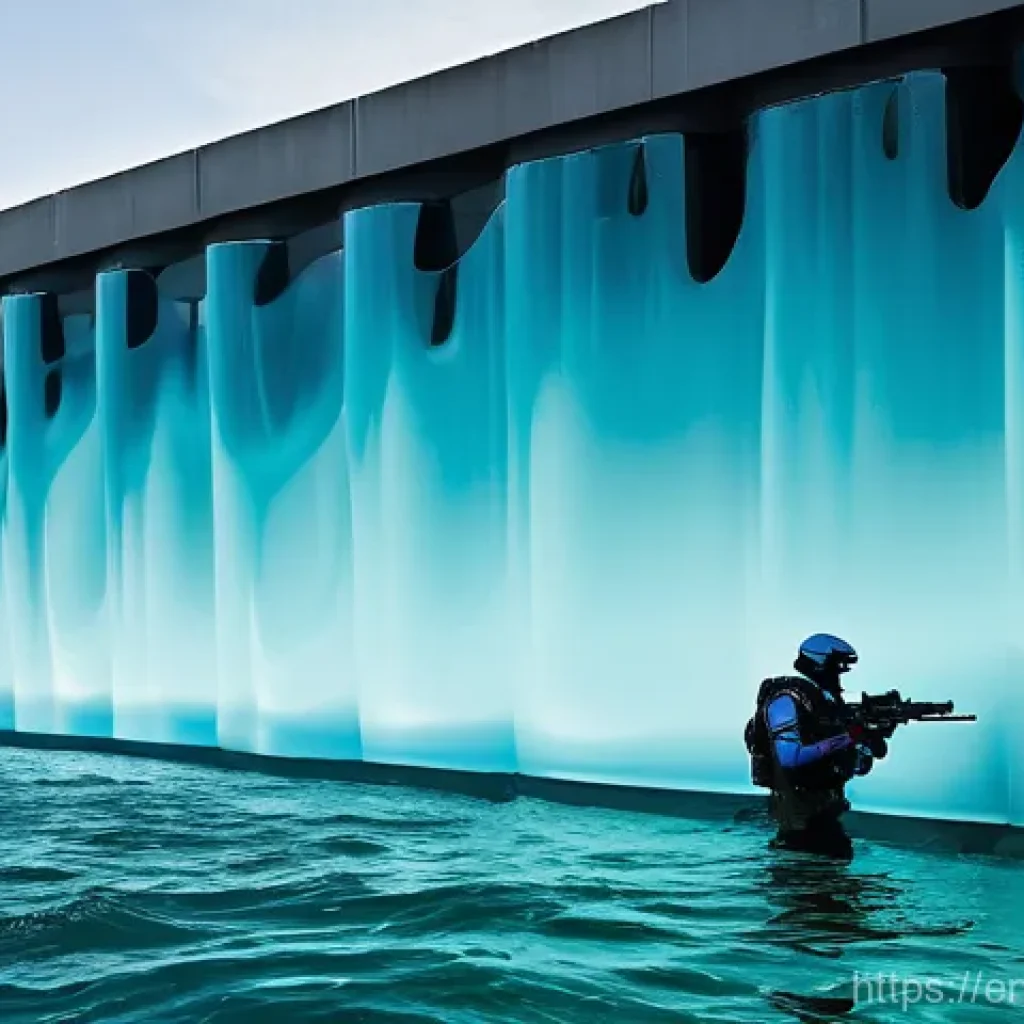
High Tide, Harbor’s signature ability, is probably the most misunderstood part of his kit, yet it’s absolutely central to his power. I’ve seen so many players just throw it down in a straight line, like a less effective Viper wall, and then wonder why it doesn’t do much. But the magic of High Tide lies in its curves and its sheer length. I’ve spent hours in custom games figuring out how to bend this wall to my will, and let me tell you, it opens up so many possibilities. Think of it as a painter’s brush, allowing you to sculpt the battlefield rather than just draw a line. It’s fantastic for blocking off expansive areas, yes, but its true strength comes from creating those intricate patterns that deny multiple angles simultaneously or section off a site perfectly for an execute. When defending, a good High Tide can completely shut down a push, forcing enemies to either wait it out, push blindly through the slow, or rotate. On offense, it’s your moving cover, allowing you to advance through contested areas with relative safety. The trick is to use it proactively, not reactively. Don’t wait for the enemy to show up; deploy it to dictate where they *can’t* go and where *you want* to go. It’s a proactive tool for map control, and once you start viewing it that way, you’ll see your impact skyrocket. The feeling of flawlessly executing a site take with a perfectly shaped High Tide protecting your team is just unbeatable.
Crafting the Perfect Curved Wall for Site Entry
One of the “radiant tech” tricks I absolutely adore with High Tide is the curved wall for site entry. Instead of just a straight line, which can often leave gaps or expose your team to common angles, learning to curve your High Tide is a game-changer. I often practice specific lineups on maps like Lotus or Breeze, where you can wrap the wall around a corner or an object. This allows you to simultaneously block off main entry points, heaven angles, and even some deep flank routes, all with a single ability. It feels incredibly powerful to cut off three potential threats at once. When I’m pushing A site on Lotus, for instance, I’ll often draw a High Tide that starts at the main entrance, curves around the pillar, and extends towards the tree, essentially creating a safe tunnel for my duelists to enter while denying vision from all critical angles. This kind of nuanced wall placement requires a deep understanding of each map’s geometry and common enemy positions, but the payoff is immense. It transforms a chaotic entry into a controlled, coordinated push, and as a controller, that’s exactly what you’re aiming for. It minimizes the angles your team has to worry about, letting them focus on fragging.
Using High Tide for Aggressive Holds and Reroutes
High Tide isn’t just for offense; it’s a beast on defense too, especially for aggressive holds or reroutes. I’ve had incredible success using it to cut off early rushes or to create unexpected flanks. Imagine you’re defending B on Bind. If you see an early push into Hookah, you can throw a High Tide that extends across the main entrance, blocking vision for the initial attackers. Then, you can use the cover to reposition, or even push through an unexpected angle. What I love doing is drawing a wall that creates a temporary ‘cubby’ near a key choke point. Opponents pushing through often assume you’ve retreated, only for me to pop out and secure a kill. Another brilliant use is to reroute enemy pushes. If they’re committed to one side, a well-timed High Tide can force them to slow down, rethink, or even rotate, buying your team precious seconds. I’ve saved countless rounds by simply delaying an enemy push long enough for my teammates to rotate and reinforce. The slow effect on enemies passing through it is also severely underrated; it can turn an easy escape into a death trap or make a challenging duel much more manageable. It really feels like you’re shaping the battlefield with water, bending it to your will.
Cove: Your Portable Shield and Plant Enabler
Ah, Cove! This little orb of watery goodness is, in my experienced opinion, one of the most clutch abilities in the entire game, yet so many players don’t use it to its full potential. I’ve seen it used as a simple smoke, which is fine, but it’s so much more. Cove is a portable, bullet-absorbing shield, a defuse-denying safe haven, and an enemy-confusing bubble of brilliance all rolled into one. I’ve clutched so many rounds where I was down to just me and an enemy, and that little Cove bought me just enough time to plant the spike or get the defuse off. It’s like having a tiny, mobile safe zone that can turn the tide of a round in an instant. The mental game behind a Cove is huge too. Enemies often spam it, revealing their positions and wasting precious ammo, all while you’re either safely planting or healing up behind it. The sound cue it makes when broken is also fantastic info. I think the key is to be imaginative with its placement and timing. It’s not just for planting; I’ve used it to isolate enemies, block off sniper sightlines, or even to cover a risky revive on Sage. Every time I get a critical plant or defuse thanks to a well-placed Cove, I just can’t help but smile. It’s a testament to how deceptively powerful this ability truly is when used intelligently.
Securing the Spike: The Ultimate Plant and Defuse Tool
Let’s be real, Cove is absolutely indispensable for post-plant and defuse scenarios. When it comes to securing that spike, there’s almost nothing better. I always try to save at least one Cove for planting, especially if we’re going for a default plant spot. Dropping it right on top of the spike as you start planting creates a crucial pocket of safety. The enemy has to either destroy the Cove, giving away their position and allowing your team to peek, or try to spam through, which often just wastes their utility and ammo. I’ve had countless defuses where I popped Cove, started the defuse, and then had just enough time to finish it as the enemy finally broke the shield. On the flip side, for retakes, a Cove can be your best friend. If you manage to get a quick pick or create some space, throwing a Cove on the spike forces the enemy to make a move. You can peek off the breaking sound, or use it to deny enemy utility that would otherwise deny your defuse. It’s pure psychological warfare. I’ve seen enemies completely panic and push into disadvantageous positions just because they couldn’t get a clear line of sight on the spike. It’s a game-changer for those nail-biting 1v1 or 1v2 situations.
Aggressive Cove Plays: Entry and Denial
While Cove is a defensive powerhouse, don’t underestimate its aggressive potential. I’ve picked up some truly “200 IQ plays” using Cove during entry. For example, on a tight choke point, sometimes I’ll pop a Cove just beyond the entry point as my team pushes. This creates an immediate safe zone for my duelists to dash into, allowing them to reposition or reload without taking immediate damage. It’s like a temporary forward operating base that pushes the line of engagement further into enemy territory. What’s even better is using it to deny critical utility. Imagine an enemy Sova darting a site or a Killjoy setting up a Nanoswarm. A well-placed Cove can absorb those initial shots or block the line of sight, protecting your team from early utility damage and giving you a cleaner entry. I’ve often used it to deny Operators too. If I know an OPer is holding a specific angle, I’ll toss a Cove to block their line of sight, forcing them to reposition or push up, which usually plays right into my team’s hands. It’s all about being creative and thinking outside the box with this ability. It isn’t just a shield; it’s a versatile tool for both proactive pushes and reactive denials.
Cascading Chaos: Aggressive Plays and Flank Control
Cascade is Harbor’s most dynamic and often underutilized ability, in my experience. Many treat it as a secondary, smaller smoke, but that’s really selling it short. Cascade is a moving wall of water that can cut off angles, delay pushes, or even be used as an aggressive, moving flash-like effect. I’ve found that the real power of Cascade comes from its ability to stop midway, giving you unparalleled flexibility. This isn’t just a deploy-and-forget ability; it’s something you actively control throughout its duration. I’ve used it countless times to make aggressive peeks, splitting sites, or even to cover a quick flank. It’s perfect for creating those unexpected moments where the enemy has to guess your next move. When I’m feeling particularly cheeky, I’ll even use both charges of Cascade to create a double layer of confusion, pushing through the first wall as it dissipates and then using the second to re-engage or escape. It’s incredibly satisfying to watch enemies get disoriented by the moving wall, allowing my team to capitalize on their confusion. This ability truly embodies the ‘initiator’ part of his controller-initiator hybrid role, enabling aggressive plays that most other controllers can only dream of. Trust me, once you start stopping those cascades mid-flow, you’ll feel like a Valorant god.
Dynamic Site Takes with Moving Walls
When it comes to attacking a site, Cascade can be your best friend for dynamic pushes. I’ve had so much success using it to cut off vision and then aggressively follow behind it. Imagine you’re pushing A site on Ascent. Instead of just throwing a static smoke, I’ll deploy a Cascade down A Main, pushing it forward as my team advances. This means the enemy can’t simply wait for the smoke to fade; they have to react to the moving wall. What’s more, I can stop the wall at any point, creating temporary cover or isolating an enemy playing a deep angle. If you need to clear a specific corner, you can even use Cascade to block off everything else, forcing the enemy to either challenge you directly or fall back. I’ve often used it to split up a site. For example, if I need to clear heaven and dicey, I’ll send a Cascade towards heaven, blocking it off, while my team focuses on ground level. It ensures that enemies can’t easily cross-fire or provide mutual support, turning what would be a tough multi-angle fight into a series of more manageable duels. It’s all about creating advantageous situations for your team through calculated vision denial and movement.
Flank Protection and Retake Utility
Cascade isn’t just for pushing; it’s also incredibly potent for protecting flanks and during retakes. I can’t tell you how many times a well-timed Cascade has saved my team from a nasty flanker. If you’re on a site post-plant and suspect an enemy is trying to push through a specific choke point, a Cascade deployed down that path can effectively slow them down, block their vision, and alert your team to their presence. The slow effect applies to enemies passing through it, buying your team crucial seconds to react. During retakes, Cascade shines even brighter. Let’s say you’re retaking B on Bind. You can use a Cascade to cut off Hookah or B Long, isolating the remaining enemies on site. This forces them to either commit to a vulnerable push through your wall or fall back into a less advantageous position. The best part? You can use both charges! I’ve had moments where I’ve used the first Cascade to push an area, gained an entry kill, and then immediately used the second Cascade to block off a new angle or deny a counter-push. It’s a fantastic ability for fragmenting the enemy team and cleaning up rounds, making you feel like a strategic mastermind.
Synergy with Teammates: Making Waves Together
Harbor, while powerful on his own, truly shines when he’s part of a cohesive team composition. I’ve seen some incredible synergy plays with him, and it makes all the difference in competitive matches. He’s not really a solo hero agent in the same way a Jett or Reyna might be; he’s a force multiplier. His abilities create opportunities that other agents can exploit to devastating effect. I’ve personally had amazing games where I’ve paired with aggressive duelists, allowing them to push through my walls with confidence, or with precise initiators who capitalize on the vision denial I provide. It’s like a well-oiled machine where each part enhances the other. I believe that understanding these synergies is crucial to unlocking Harbor’s full potential and ensuring your team gets the most out of his unique utility. It’s not just about what *you* do with Harbor, but how *your team* leverages the spaces and opportunities you create. When everyone is on the same page, those watery walls turn into an unstoppable tide that can overwhelm any defense. It’s a truly collaborative agent, and that’s what makes him so much fun to play when you have a good team.
Complementing Duelists: Aggressive Entries and Safe Retreats
Harbor is an absolute dream for aggressive duelists like Jett or Raze. I often communicate with my duelists about where and how I’ll be deploying my High Tide or Cascade, allowing them to plan their dashes and boosts. My walls provide the perfect cover for a Jett to dash onto a site, or for a Raze to satchel in, knowing they have temporary protection from crossfires. I’ve found that using High Tide to cut off multiple angles as my duelist pushes, then following up with a Cove on the plant spot, creates an incredibly safe and effective entry. This allows them to focus purely on clearing the immediate threats rather than worrying about multiple angles. What’s more, a well-timed Cascade can provide an instant escape route or cover for a duelist who’s pushed too deep or needs to fall back for a quick heal. It’s like having a mobile safety net, ensuring your star fraggers can take those risky plays and still have a way out. I’ve often heard my duelists express how much more confident they feel pushing when they know I’m ready with a wall or a shield to support their entry.
Empowering Initiators: Unveiling Enemies Behind Walls
Harbor’s vision denial pairs incredibly well with initiators who can capitalize on obscured sightlines. Agents like Sova, Fade, or even Breach become significantly more effective when I’m playing Harbor. Imagine a Sova recon darting an area that I’ve just High Tided. The enemies are either forced to shoot the dart, revealing their position, or get tagged inside the wall, giving us crucial information about their exact location without them being able to see us. I’ve had many rounds where a Fade Prowler or a Sova Recon dart reveals enemies just as my High Tide fades, allowing my team to pre-fire or push aggressively onto exposed targets. What I personally love doing is combining my Cove with a Kayo knife. If I throw a Cove onto a plant, and Kayo throws his knife into the bubble, any enemies trying to spam through will be suppressed, making them easy targets for my team to pick off. It’s a fantastic way to punish enemies who try to blindly push through your utility. This kind of synergy transforms basic utility usage into truly advanced plays that can completely dismantle enemy defenses. It really feels like a coordinated attack, and the enemy often struggles to adapt to the multi-layered assault.
Navigating the Tides: Best Maps for Harbor

Just like any agent in Valorant, Harbor truly shines on specific maps where his unique utility can be maximized. I’ve played him on every single map in rotation, and while he can be functional anywhere, there are definitely those maps where I feel like I can absolutely dominate the server. His sprawling High Tide and versatile Cove just work wonders in certain layouts, allowing you to control large areas or secure vital objectives with ease. I’ve always felt that maps with longer sightlines and multiple entry points benefit most from his kit, as he can cut off so many angles at once. It’s not just about raw numbers or win rates; it’s about the feeling of flow and control you get when his abilities perfectly complement the map’s design. When you find that perfect map where you can just effortlessly weave your walls and bubbles to outmaneuver the enemy, that’s when playing Harbor truly becomes an art form. I’ve definitely got my personal favorites where I always feel confident picking him, knowing I can make a huge impact on the outcome of the game. It’s about knowing where your water can create the biggest waves!
Maps with Expansive Sites and Long Sightlines
From my experience, Harbor thrives on maps with large, open sites and long corridors, where his High Tide can truly stretch its legs and block off multiple critical angles. Maps like Breeze, Icebox, and Lotus immediately come to mind. On Breeze, for instance, his High Tide can cover almost the entire width of A site, making pushes incredibly safe. I’ve had phenomenal success using it to cut off Mid on Breeze, allowing my team to rotate or push aggressively without fear of getting flanked. Icebox is another fantastic map for him; his High Tide can deny pushes through Tube or across Mid, and his Cove is perfect for securing plants on either site, especially with its bullet-absorbing properties against spam. Lotus, with its three bomb sites and numerous entry points, allows Harbor to be incredibly versatile. I can cut off an entire side of A or C with a single wall, or use Cascade to split B main. Even Sunset, a newer addition, benefits from his wall to control its often chaotic mid-section. His ability to cover vast areas and force enemies into disadvantageous positions is precisely why he excels on these larger, more open maps. It’s about denying the enemy vision across vast distances, which is something few other controllers can do so effectively.
Leveraging Choke Points and Tight Angles
While expansive maps are great, Harbor is surprisingly effective on maps with tight choke points and crucial angles that need to be cleared or blocked. Think about maps like Bind or Ascent. On Bind, for example, a well-placed High Tide can completely shut down a push through Hookah or Showers, forcing enemies to either wait or push blindly. I’ve often used Cove to secure plants in tight corners on these maps, where enemy spam would otherwise be devastating. Ascent, despite its defensive nature, also offers great opportunities. My High Tide can block off Mid entry points or segment a site during a push, isolating enemies in predictable spots. The key here is not just blocking sight, but using the slow effect of High Tide and the bullet-absorbing nature of Cove to create an unfavorable fight for the enemy. If they push through your wall in a tight choke, they are slowed and vulnerable, making them easy targets for your teammates. It’s about creating micro-advantages in enclosed spaces. I’ve had many clutch moments where a perfectly timed Cascade stopped an aggressive peek or allowed me to push through a narrow corridor unscathed, making all the difference in a close round. The versatility of his kit allows him to adapt to different map geometries, which is why I believe he’s a truly underrated agent.
| Harbor’s Abilities | Description | Tactical Use Cases |
|---|---|---|
| High Tide (E) | Equip a wall of water. Fire to send the wall forward along the ground. Hold fire to guide the water in the direction of your crosshair, passing through walls. Enemies hit by the wall are slowed. | Blocking multiple sightlines on large sites, creating moving cover for pushes, cutting off rotations, creating aggressive cubby angles for unexpected peeks. |
| Cascade (C) | Equip a wave of water. Fire to send a wave that blocks bullets and slows enemies. Can be stopped early by re-using the ability. | Aggressive entry smoking, flank denial, isolating individual enemies, temporary bullet shield, quick escapes, post-plant spam denial. |
| Cove (Q) | Equip a sphere of water. Fire to throw. On impact, a water shield deploys that blocks bullets. | Securing spike plants/defuses, absorbing enemy utility, denying Operator sightlines, creating safe zones for reloads/heals, quick bullet protection in open areas. |
| Reckoning (X) | Equip the full power of your Artifact. Fire to summon a geyser pool on the ground. Enemies in the area are repeatedly concussed by geyser strikes. | Clearing sites, forcing enemies out of cover, denying retakes, initiating pushes, gathering information on enemy positions (they get concussed). |
Beyond the Basics: Advanced Tips for Radiant Plays
If you’re looking to truly elevate your Harbor gameplay from good to “Radiant-level,” you’ve got to go beyond just the obvious uses of his abilities. I’ve spent countless hours studying pro players and high-elo streams, and what I’ve learned is that the real magic happens in the subtle nuances and the unexpected plays. It’s about anticipating enemy movements, understanding the flow of utility, and always having a backup plan. This isn’t just about throwing a wall; it’s about designing a dynamic battlefield that constantly puts the enemy at a disadvantage. I’ve had so many moments where I’ve pulled off a play that even my teammates didn’t see coming, and those are the rounds that truly feel earned. It’s about that next-level thinking, that “200 IQ” play that separates the good Harbors from the truly exceptional ones. If you want to climb those ranks and make a real impact, you need to start thinking several steps ahead, treating every ability as a chess piece in a grand strategy. Trust me, once you start incorporating these advanced techniques, you’ll see your win rate climb and your enemies scratching their heads.
The Art of the “Cubby Wall” and Unpredictable Peeks
This is probably my favorite piece of “Radiant tech” to pull off with Harbor, and it infuriates enemies every single time. The “cubby wall” involves strategically curving your High Tide or even using Cascade to create a small, unexpected corner or pocket of cover near a commonly held angle. Instead of just blocking vision, you’re creating a new, temporary piece of terrain that enemies don’t expect. I often use this on defense. For example, on Bind A site, I might draw a High Tide that creates a small cubby near the showers entrance. Enemies pushing through will often clear the standard angles but completely overlook that small pocket I’ve created. I’ve gotten so many free picks by just waiting there, and when they push past, I swing out and catch them from behind. It’s about being unpredictable and using the dynamic nature of your walls to your advantage. Another variation is to deploy a wall, pretend to fall back, and then re-peek an angle that the enemy thinks is now clear. The visual clutter and the slow effect often disorient them, giving you a crucial advantage in the duel. This requires excellent game sense and map knowledge, but when executed correctly, it’s almost always a guaranteed frag and a huge morale blow to the enemy team.
Ultimate Synergies and Post-Plant Dominance
Harbor’s ultimate, Reckoning, is a phenomenal tool for both initiating pushes and locking down post-plants, especially when combined with other agent ultimates. I’ve found that using Reckoning to clear a site before an entry, forcing enemies out of cover or into predictable spots, sets up my duelists perfectly. The concussion effect is incredibly disorienting, making enemies easy targets. But where it truly shines, in my humble opinion, is in post-plant situations. If you’ve got the spike down, popping Reckoning on site completely denies defuses and forces enemies to either retreat or fight at a severe disadvantage. I’ve combined it with Raze’s ultimate for devastating combos, where enemies are concussed and then blasted into oblivion. Another fantastic synergy is with a Sova or Fade ultimate; the concussed enemies become prime targets for their utility, essentially turning the site into a death trap. I always try to save my ult for these crucial moments, as it can single-handedly win rounds. The ability to disrupt and deny an entire area makes Harbor’s ultimate a game-changer, turning almost lost rounds into glorious victories. It’s about creating an unassailable stronghold around the spike, making any defuse attempt a suicidal mission for the enemy.
The Mind Games of Harbor: Reading Your Opponent
Playing Harbor isn’t just about knowing your abilities; it’s about knowing your opponents. I’ve learned that the most effective Harbor players aren’t just reacting to what the enemy does, but actively predicting and manipulating their decisions. His kit is a masterclass in psychological warfare. Every wall you draw, every Cove you deploy, should be a question mark in the enemy’s mind. Will you peek through it? Will you push past it? Are you creating an advantage or baiting them into a trap? This level of strategic thinking is what truly differentiates a good controller from a great one. I’ve spent countless hours analyzing enemy patterns, understanding common pushes, and then designing my utility usage to specifically counter those habits. It’s about being one step ahead, making them constantly guess your intentions. When you start to feel like you’re inside their heads, dictating their movements without them even realizing it, that’s when you know you’re truly mastering Harbor. It’s a deeply satisfying aspect of playing him, and it makes every round feel like a high-stakes chess match.
Feinting and Faking with Water Walls
One of my absolute favorite tricks with Harbor is using his walls for feints and fakes. This isn’t something you see very often in lower ranks, but at higher tiers, it’s a staple. Imagine you’re on attack, and you want to make the enemy think you’re pushing A. I’ll often deploy a High Tide that looks like a full A push, but my team and I will actually be rotating to B. The sheer length and visibility of Harbor’s wall makes it incredibly convincing. Enemies often commit utility or even rotate players to counter what they perceive as a strong push, only to realize too late that they’ve been outmaneuvered. I’ve also used Cascade for smaller, more localized fakes. A quick burst of Cascade into a choke point can make an enemy think you’re committing, forcing them to use a flash or pre-fire an angle, only for you to never actually push. It’s all about wasting their utility and creating confusion. This kind of deceptive play requires good team communication, but when it lands, it can completely throw the enemy’s rhythm off and give your team a huge advantage. It’s about using their assumptions against them, turning your utility into a potent psychological weapon.
Punishing Over-Aggression with Control
Harbor is absolutely incredible at punishing over-aggressive enemies. His abilities, particularly High Tide and Cascade with their slow effects, can turn a confident push into a fatal mistake. I’ve had so many instances where an enemy duelist, trying to take an early aggressive peek, gets caught in my High Tide. That slow effect makes them an easy target for my teammates, or even for me if I’m holding an angle. It’s like a built-in trap. What’s even better is using Cove to deny aggressive Operator peeks. If an OPer is holding a common angle, a quick Cove can block their line of sight, forcing them to reposition or become vulnerable. If they try to push through it, they’re exposed and susceptible to headshots. I love watching enemies get frustrated when they can’t get that clean pick because my Cove is soaking up their bullets. It’s about using your utility to turn their strengths into weaknesses, forcing them to play on your terms. This ability to consistently shut down aggressive plays makes Harbor a true anchor for any team, providing a sense of security and control that allows your teammates to play more confidently. It’s incredibly satisfying to watch an over-confident enemy suddenly find themselves caught in your watery embrace, realizing they’ve made a terrible mistake.
Advanced Movement and Positioning with Harbor
When I first started playing Harbor, I thought his abilities were just about blocking vision. But after countless games, especially in clutch situations, I realized his water utilities are incredibly powerful for dictating movement and creating unexpected positioning. It’s not just about where the enemies can’t see, but where *you* can see and where *they can’t possibly expect you to be*. His High Tide, with its ability to be bent and manipulated, can create temporary elevated positions, unexpected cubbies, or even give you a clear line of sight where none existed moments before. I’ve found that combining his mobility-altering walls with smart positioning allows for some truly “200 IQ plays” that completely throw off enemy expectations. It’s like turning the map into your personal water park, and you’re the lifeguard dictating where everyone can and can’t swim. This goes beyond basic agent guides; this is about truly understanding how your unique kit interacts with the environment to create advantages that nobody else can replicate. When you start thinking about verticality and unexpected angles through your walls, that’s when Harbor truly becomes a force to be reckoned with.
Gaining Unconventional Angles and Verticality
Harbor’s High Tide isn’t just a flat wall; with creative placement, it can help you take truly unconventional angles, sometimes even creating pseudo-vertical advantages. While it doesn’t boost you physically, it often creates lines of sight that enemies simply aren’t expecting. For example, by drawing a High Tide along a ramp or an elevated area, you can block off ground-level vision while potentially gaining a sliver of sight over the top of the wall or through a crack that opponents aren’t clearing. I’ve used this to great effect on maps like Split, where a wall up a ramp can shield me while I peek over it from an unexpected high point. Even better, his Cascade, when timed perfectly, can allow you to cross dangerous sightlines that an OPer might be holding, giving you the element of surprise. The bullet-blocking nature of Cascade means you can essentially “push” a small, temporary shield into an enemy’s face, forcing them to reposition or shoot a moving target while you quickly gain an advantageous angle. It’s about using the environment and your abilities together to craft unique positions that disrupt traditional engagement patterns, leaving enemies scrambling to adapt to your unpredictable plays.
Rotational Control and Escaping Sticky Situations
Harbor’s kit is fantastic for controlling rotations and, crucially, for getting out of sticky situations when a push goes wrong. I’ve often used High Tide to cut off enemy rotations through mid or common pathways, buying my team crucial seconds to consolidate a site or regroup. The sheer length of the wall means you can often block off multiple potential rotation routes with a single ability. But perhaps my favorite aspect is his ability to disengage. If I’ve pushed too aggressively or find myself outnumbered, a well-placed Cascade can immediately block enemy vision and slow anyone chasing me, allowing for a clean escape. I’ve had so many moments where I was caught out, popped a Cascade, and just melted away into the smoke, leaving confused enemies behind. Similarly, Cove can be an instant “get out of jail free” card. If you’re caught in the open, a quick Cove can absorb incoming damage, giving you a chance to reposition behind hard cover or reload your weapon. This combination of offensive push and defensive escape utility makes Harbor an incredibly self-sufficient controller, capable of making big plays and also surviving when things get dicey. It’s a lifesaver that lets you be more aggressive without necessarily risking everything.
Concluding Thoughts
Whew! What a journey we’ve been on, diving deep into the watery world of Harbor. It’s truly amazing how much depth this agent offers once you get past the initial learning curve. I honestly feel like playing Harbor has made me a more strategic and adaptable player overall, constantly thinking about how to manipulate the battlefield rather than just reacting to it. There’s a profound satisfaction that comes from orchestrating a perfect site execute with your High Tide or clutching a defuse behind a bullet-proof Cove. He’s not always the flashiest agent, but his impact on a round can be absolutely undeniable. I hope these insights help you unleash his true potential and start making some serious waves in your ranked games. Keep practicing, keep experimenting, and most importantly, keep having fun!
Useful Information
1. Don’t underestimate the “slow” effect of High Tide and Cascade. It can be a death sentence for aggressive enemies caught in its path, giving your team crucial milliseconds to secure a kill. It’s a fantastic tool for punishing over-extensions.
2. Always try to save at least one Cove for post-plant or retake situations. Its bullet-blocking property is unparalleled for securing the spike, buying you valuable time and often forcing enemies to make predictable pushes.
3. Practice curving your High Tide in custom games. Learning specific lineups for different maps can transform your entry or defensive holds, covering multiple angles with a single, elegant wall. It’s a game-changer!
4. Communicate constantly with your team about your utility usage. Tell your duelists where your walls are going, and ask your initiators to capitalize on the vision denial you provide. Synergy is key with Harbor.
5. Experiment with stopping Cascade mid-flow. This allows for incredible flexibility, letting you create temporary cover, isolate enemies, or even bait out utility without committing to a full wall. It adds a whole new layer of deception to your gameplay.
Key Takeaways
Harbor isn’t just another controller; he’s a dynamic, hybrid force multiplier who excels at manipulating the battlefield. Embrace his role as both a vision denier and an initiator, constantly looking for opportunities to dictate engagement terms with his unique water-based abilities. Mastering his High Tide for expansive control, Cove for crucial objective plays, and Cascade for aggressive pushes and flanks will elevate your gameplay significantly. Remember, it’s about anticipation, teamwork, and turning the tides of battle with intelligent, calculated plays. Once you truly understand his flow, you’ll find yourself dominating rounds and outsmarting opponents with an agent unlike any other.
Frequently Asked Questions (FAQ) 📖
Q: Many players feel Harbor’s abilities are a bit slow or don’t offer enough impact. How can I really maximize his utility to feel more potent in crucial rounds?
A: Oh, I totally get where you’re coming from! When I first started playing Harbor, I felt the exact same way. His abilities can seem a bit sluggish compared to, say, a Jett dash or a Raze grenade.
But trust me, that perception changes completely once you understand their true power lies in their defensive and zoning capabilities, not necessarily raw aggression.
The trick is to think of Harbor as a master manipulator of space and vision. Instead of trying to use High Tide to just block off a whole site and push, try splitting it in half, creating narrow corridors that funnel enemies right into your crosshairs.
I’ve found that using Cascade, his moving wall, to quickly cut off common angles when you’re pushing a site or peeking an unexpected angle can catch enemies completely off guard.
It’s not about how fast it moves, but how quickly you can deploy it to deny crucial information or block a powerful defender’s sightline. And Cove, his impenetrable dome?
That thing is an absolute lifesaver for planting the Spike or safely defusing. Don’t just throw it aimlessly; drop it on the Spike to guarantee a safe plant, or use it to block off a tight entrance to gain a few precious seconds for your team to rotate.
I’ve personally clutched so many rounds just by perfectly timing a Cove on a defuse, knowing the enemy couldn’t shoot through it, even if they knew exactly where I was.
It’s all about strategic placement and understanding that his utility is designed to control engagements on your terms, not just to clear a path.
Q: Harbor is often called a “Controller-Initiator hybrid.” What does that truly mean in practice, and how should my playstyle adapt to this unique role?
A: Ah, the “Controller-Initiator hybrid” – that’s a brilliant way to describe him, and it perfectly encapsulates why so many players initially struggle to unlock his full potential!
As someone who’s spent countless hours experimenting with his kit, I’ve come to realize that this hybrid role means you’re not just blocking vision, but actively shaping the engagement and even initiating pushes in a way no other controller can.
A traditional controller, like Omen or Brimstone, focuses heavily on smoke placement for static denies. Harbor, however, with his High Tide and Cascade, creates dynamic, moving barriers.
This allows you to not only deny enemy vision but also create pathways for your duelists or even yourself to push through. In practice, this means you can initiate a push onto a site by deploying a High Tide that your teammates can follow, almost like a moving shield.
I’ve often used Cascade to clear close angles while my team follows behind, essentially acting as a mobile entry fragger but with defensive utility. Conversely, on defense, you can use these same abilities to aggressively contest pushes or slow down rushes, isolating enemies and forcing them to commit.
My playstyle with Harbor constantly shifts between supportive control and decisive initiation. You’re constantly asking yourself: “Can I use this wall to get my Jett onto site?” or “Can I use this wall to cut off their retreat?” It’s a proactive controller role that requires more communication and spatial awareness, but when you nail it, you become an unstoppable force that dictates the pace of the entire round.
Q: What are some of your absolute favorite “200 IQ” plays or “radiant tech” lineups with Harbor that you’ve personally found incredibly effective on specific maps?
A: Oh, this is my absolute favorite question! I’ve hoarded so many “Harbor moments” that just make you feel like a genius when they work out. One of my go-to “radiant tech” plays, especially on Split A Site, involves his High Tide.
Instead of just smoking off A Main, I like to run to the edge of A Main and deploy a High Tide that perfectly cuts across all of Heaven and blocks off Rafters.
Then, I immediately follow up with a Cove thrown deep into A Ramps. This essentially creates a completely safe pocket for my team to push A Main, secure default plant, and then look to clear Heaven while the High Tide is still up.
It’s a double whammy that completely suffocates their defense. Another killer move, which I’ve dubbed “The Lotus Lunge,” is on Lotus B Site. When attacking, I’ll send a Cascade down the middle of B Main towards the site.
Just as it’s about to reach the doorway, I’ll pop my Reckoning (ultimate) right behind it. The Cascade draws attention, often making enemies peek or get pushed back, and then the Reckoning just cleans up anyone caught in the open or hiding behind the initial wall.
It’s an insane one-two punch that completely disrupts their hold. And for a truly sneaky defuse on Ascent B Site, if the Spike is planted for default, I’ll throw a Cove over the wall from Lane directly onto the Spike.
This lets me defuse safely from behind the wall, totally invisible to anyone peeking from Market or CT. It’s one of those plays where the enemy team just stares at the kill feed, wondering what just happened!
The key to all these is knowing the map geometry and anticipating enemy reactions, turning Harbor’s “slow” abilities into incredibly precise and devastating tools.